While looking back over all of the projects, I was shocked and a little upset with myself that we didn't do printmaking this year. While in college, I LOVED printmaking. I even did an independent study in it and my entire senior art exhibition was printmaking. We did printmaking in 7th grade last year but I wanted to kick it up a notch this year and make it a bit more challenging. I decided to try reduction printmaking!
For this project, I took a picture of the students and used paint.net to posterize the photos into 3 colors (black, grey and white). Students shaded on the back and transferred all of their white areas onto the linoleum. We use easy carve linoleum at school and it's so easy for the kids. We haven't had any slips (or bad cuts) this year! Students used the gauge to carve away all of the areas of their print that would be left white. Since we were printing on white paper, we didn't need to print this part. All that would be left would be the grey and black areas.
They chose a color and mixed it with some white to make a tint. Then students pulled a proof. A proof is a practice print so they can see what it would look like. If they were happy with their proof, they could pull 10 or more quality prints. The students discussed what made a quality print and here is their list...
- enough ink, no white spots
- linoleum carved away where it was meant to be carved away (no stray marks)
- Ink has an orange peel texture
- No finger prints
- No smudges (where the paper slipped on the plate)


After they printed 10 or more quality prints, they had to carve away all of the grey area, leaving only the black areas to print. They then mixed a shade of ink and printed on top of their first prints.
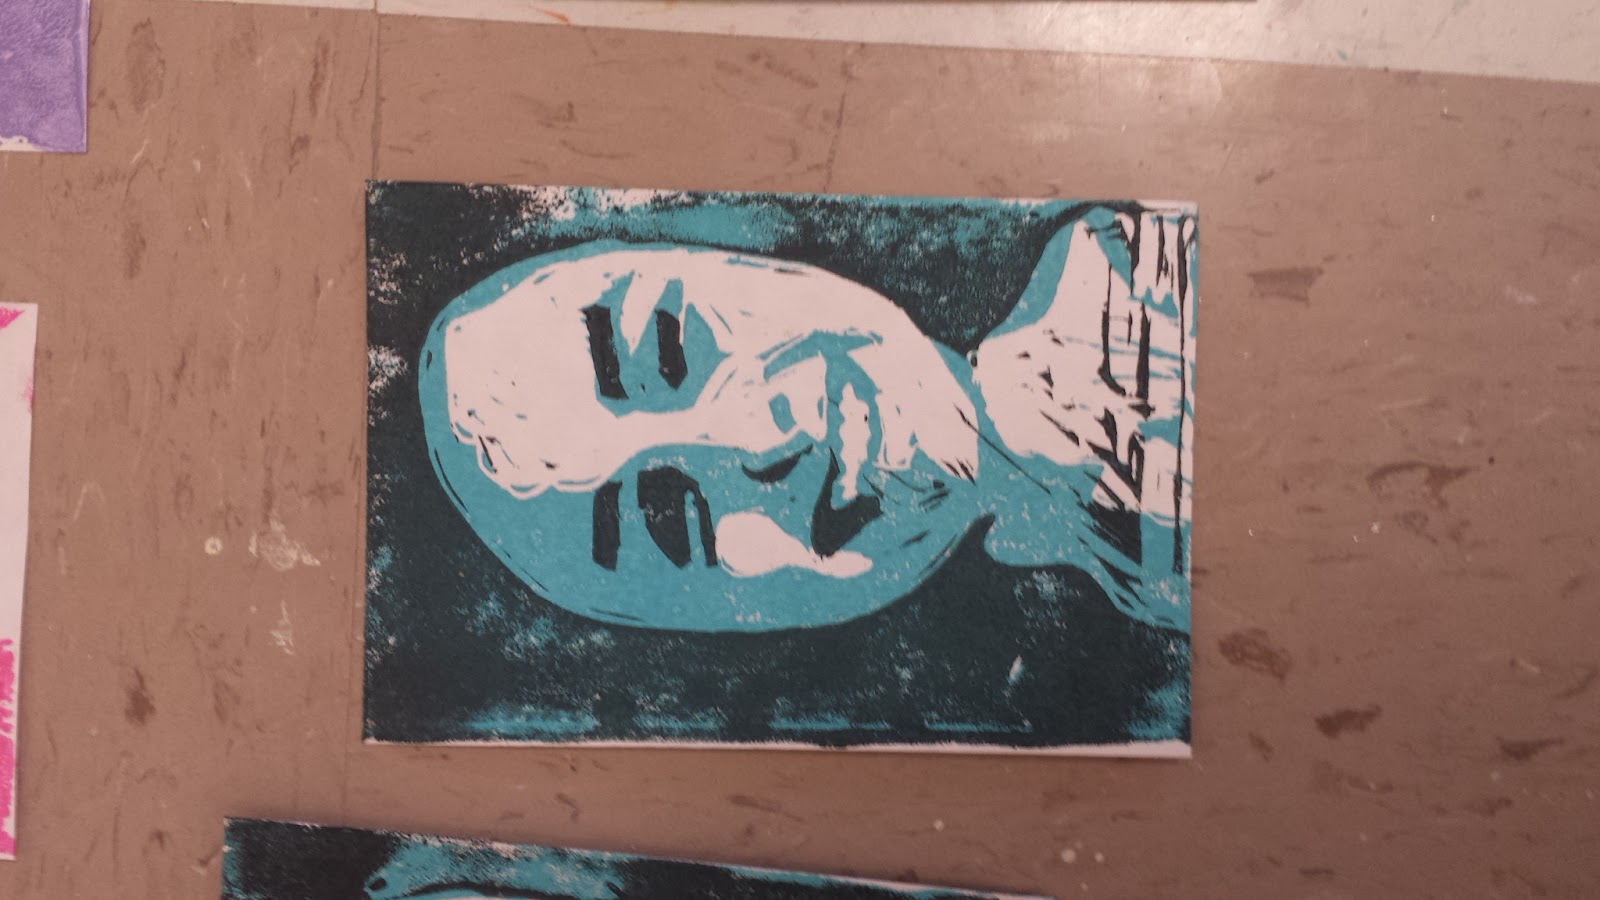
Here is the final result


Awesome! I get so nervous doing reduction prints with the kids.
ReplyDeleteHow did you posterize your photo's
ReplyDeleteAngela,
DeleteWe use pixlr.com and click adjustments>desaturate, adjustments>posterize. You can choose how many levels you want.
great job Mrs. Withem. I will attempt with my 8th grade in Carthage, M0.
Deletegreat job....congratulations
ReplyDeleteme ha gustado mucho este proyecto. Se ven resultados muy bonitos.
ReplyDeleteDid the students need to make two blocks? One for the gray and one for the black I would love to do this with my 7 and 8 graders!
ReplyDeleteThis is reduction printmaking so you carve, print, carve more, print, and so on.
DeleteThis video explains the process
https://www.youtube.com/watch?v=lJe90s1UuGs
Do you have a membership for Pixlr? I can't find the option for your steps...click adjustments>desaturate, adjustments>posterize. You can choose how many levels you want.
DeleteWhen you go to pixlr.com, scroll down a little until you see pixlr editor. Click on that and open your image. The desaturate and posterize are once you open your image. And that is when you choose how many levels you want.
DeleteTHANK YOU SO MUCH! I'm so excited to do with my students.
DeleteHow big was your class? I'm wanting to try this, but I have large classes - just trying to see if it's feasible! :) Also, what brand ink, and what kind of paper, do you use for printmaking?
ReplyDeleteThe prints all look really good. Love printmaking.
ReplyDeleteYou can also use Photoshop. Iage adjustments posterize and select how many layers you desire.
ReplyDeleteImage adjustments posterize
ReplyDelete